Expense Buddy — Local-first expense tracking with GitHub sync
I’ve tried a bunch of expense trackers over the years, and I kept running into the same problems: slow flows, cluttered screens, and a nagging feeling that I was handing over more data than I should. So I built my own.
Expense Buddy is a privacy‑first, local‑first expense tracker that stays out of your way. It’s built with React Native (Expo), keeps everything on‑device by default, and gives you optional GitHub sync if you want a personal backup you control.
Screenshots

Why Expense Buddy exists
Most expense trackers either felt slow, intrusive, or vague about where my data lived. I wanted something simple enough to open daily, fast enough to never frustrate me, and honest about storage. Expense Buddy is the result—focused on clarity, speed, and ownership:
- Local-first by default (your data stays on-device)
- Private by design (no analytics, ads, or data selling)
- Fast on large datasets with a lightweight UI
- In your control with optional GitHub sync to your own repo
Feature highlights
- Daily expense tracking with category and payment method tags
- Edit expenses anytime with a full history view to revisit and update past entries
- Smart GitHub sync with incremental, differential, and batched commits
- Analytics that go deeper: category and payment method breakdowns, instrument‑level splits, plus a spending trend chart
- Custom categories with colors and icons
- Saved payment instruments (cards and UPI IDs)
- In‑app update notes with a “What’s New” sheet after updates
- Issue reporting directly from Settings
- Light and dark mode with theme‑aware styling
Dashboard
The dashboard is my “daily check‑in” screen. It gives me a quick view of recent spending and a simple 7‑day trend. I made the graph tappable because I kept wanting to jump straight into that day’s entries.
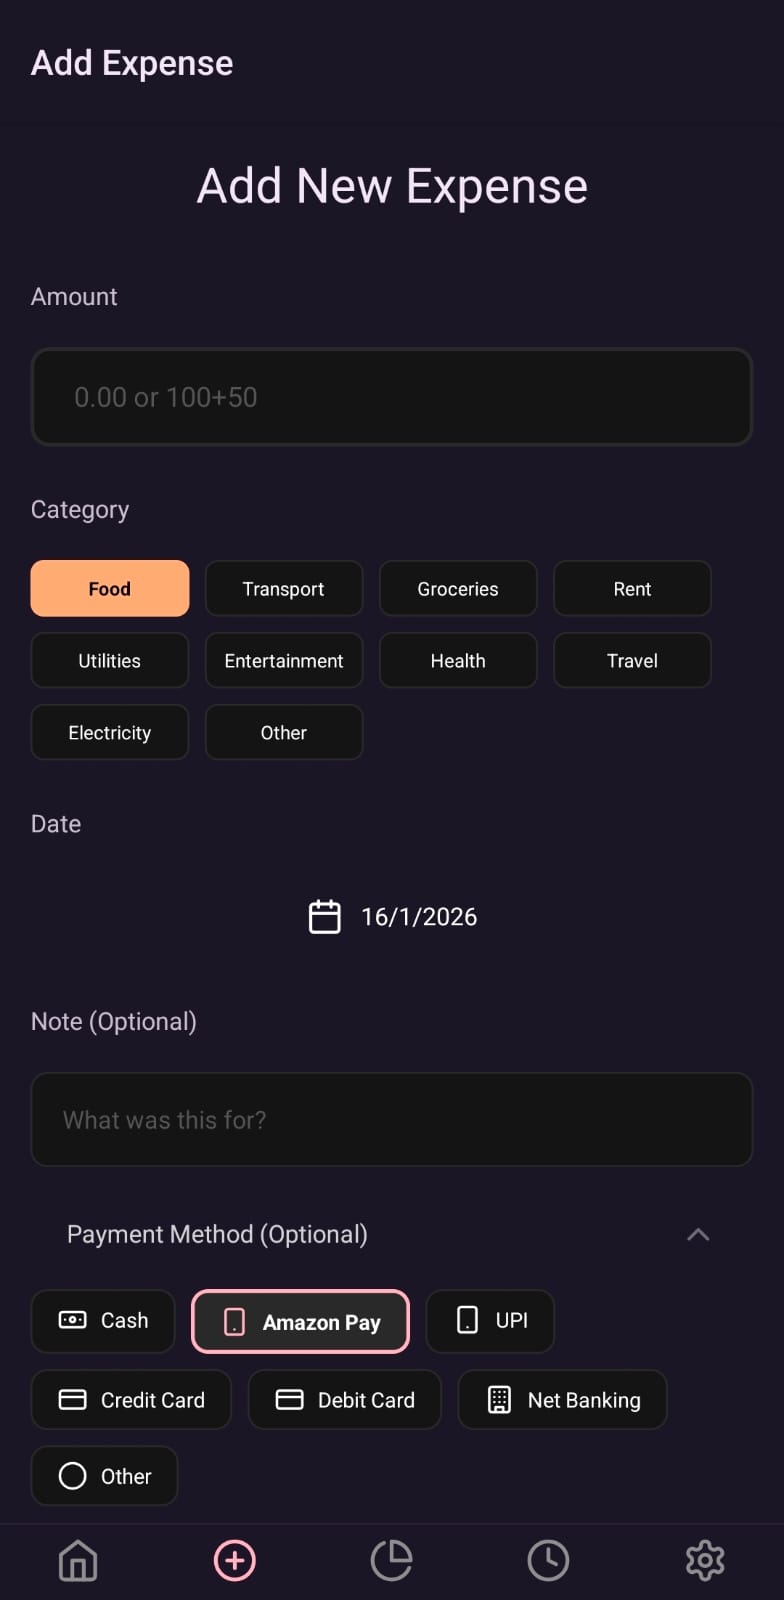
Add expense
Adding an expense should be boring—in a good way. It’s a one‑screen flow with quick category and payment method picks so I can log something in a few seconds and move on.
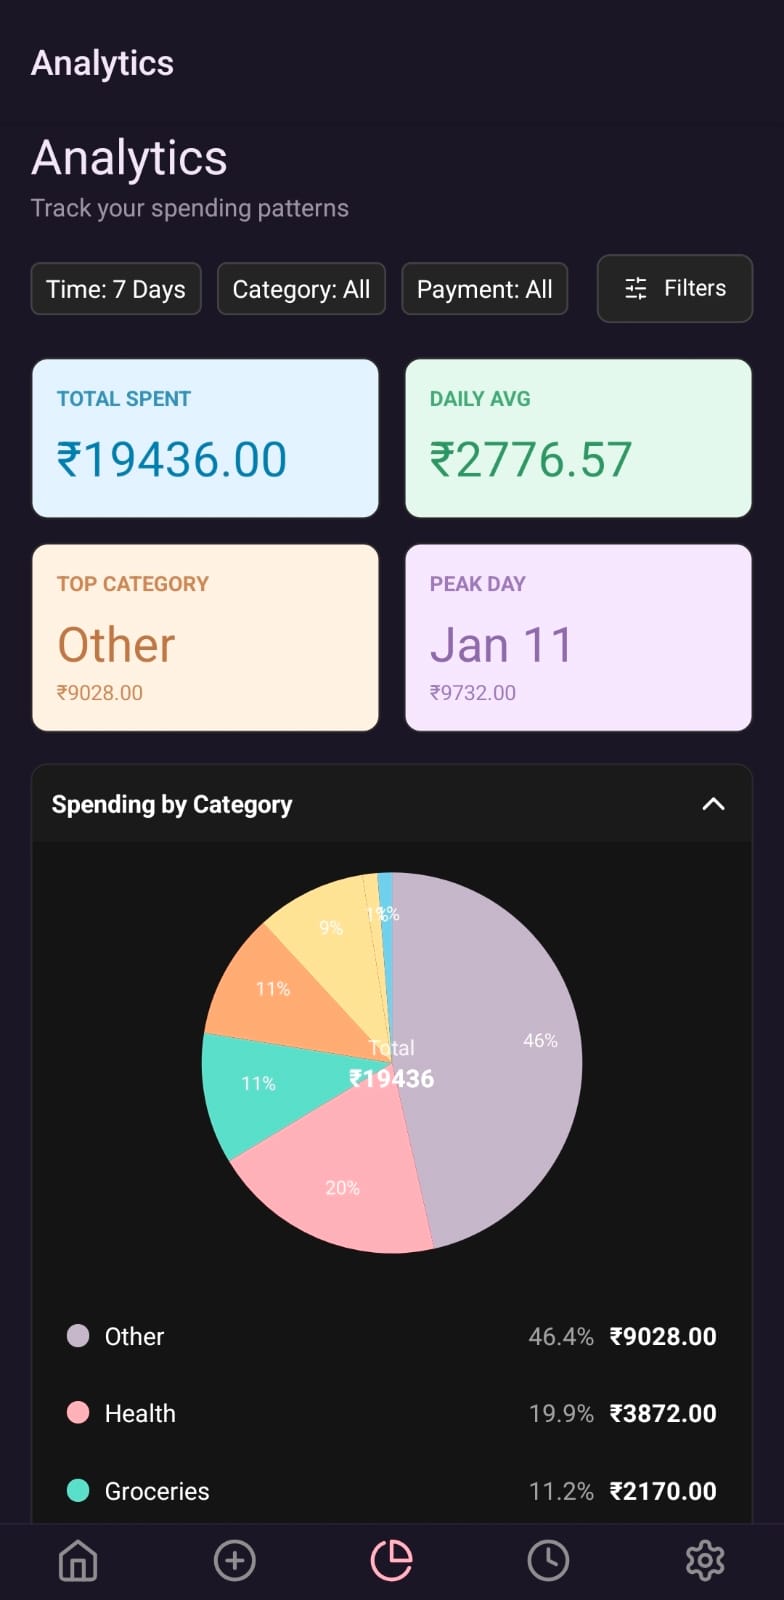
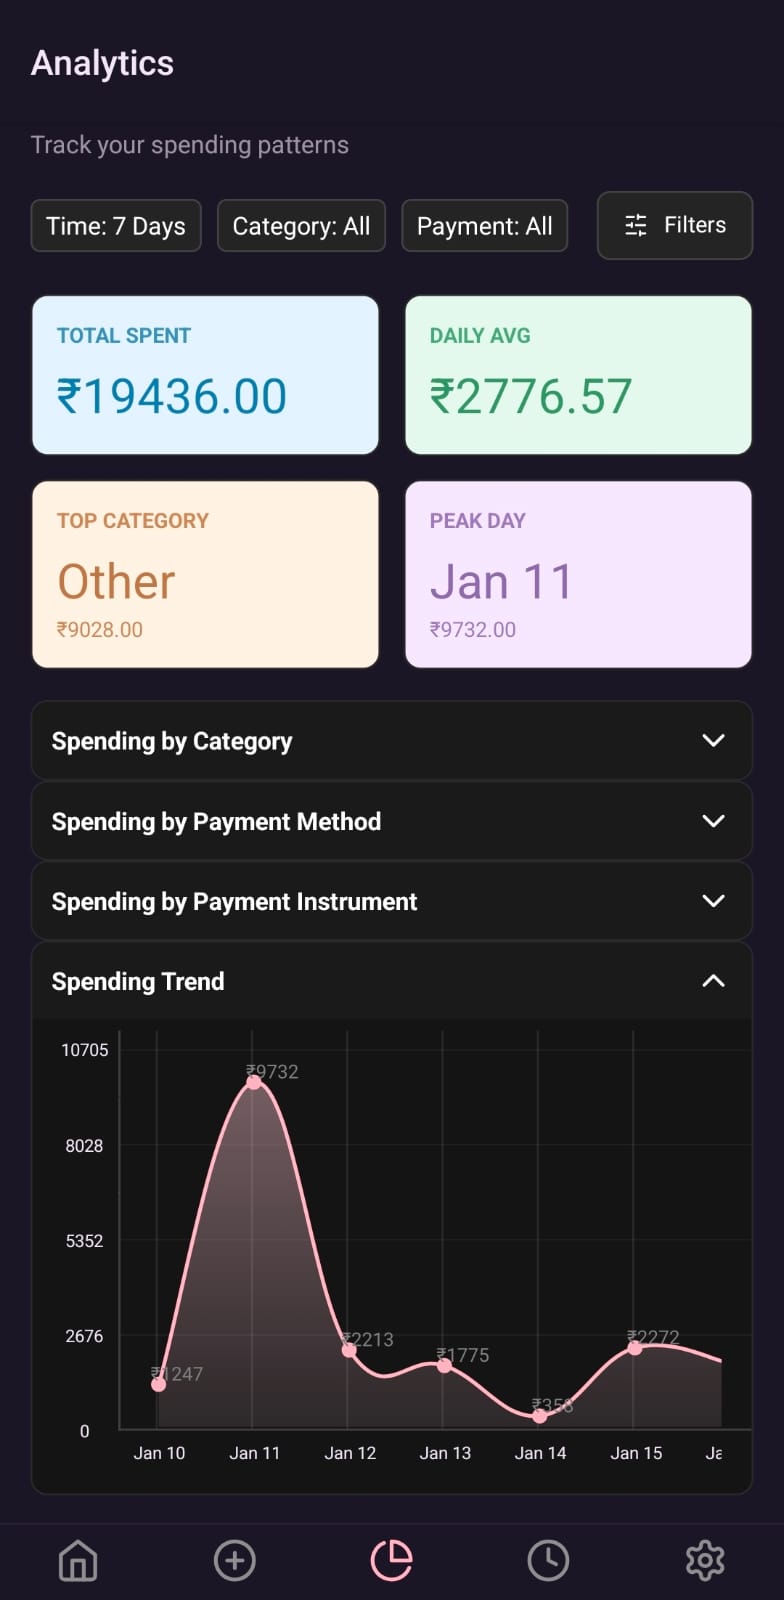
Analytics you can trust
I wanted answers, not charts for the sake of charts. The analytics tab helps me see where money goes by category, payment method, and saved instrument, then zoom out with a spending trend view. I also added multiple time windows so I can compare “this week” vs. “the last 3 months” without leaving the screen.
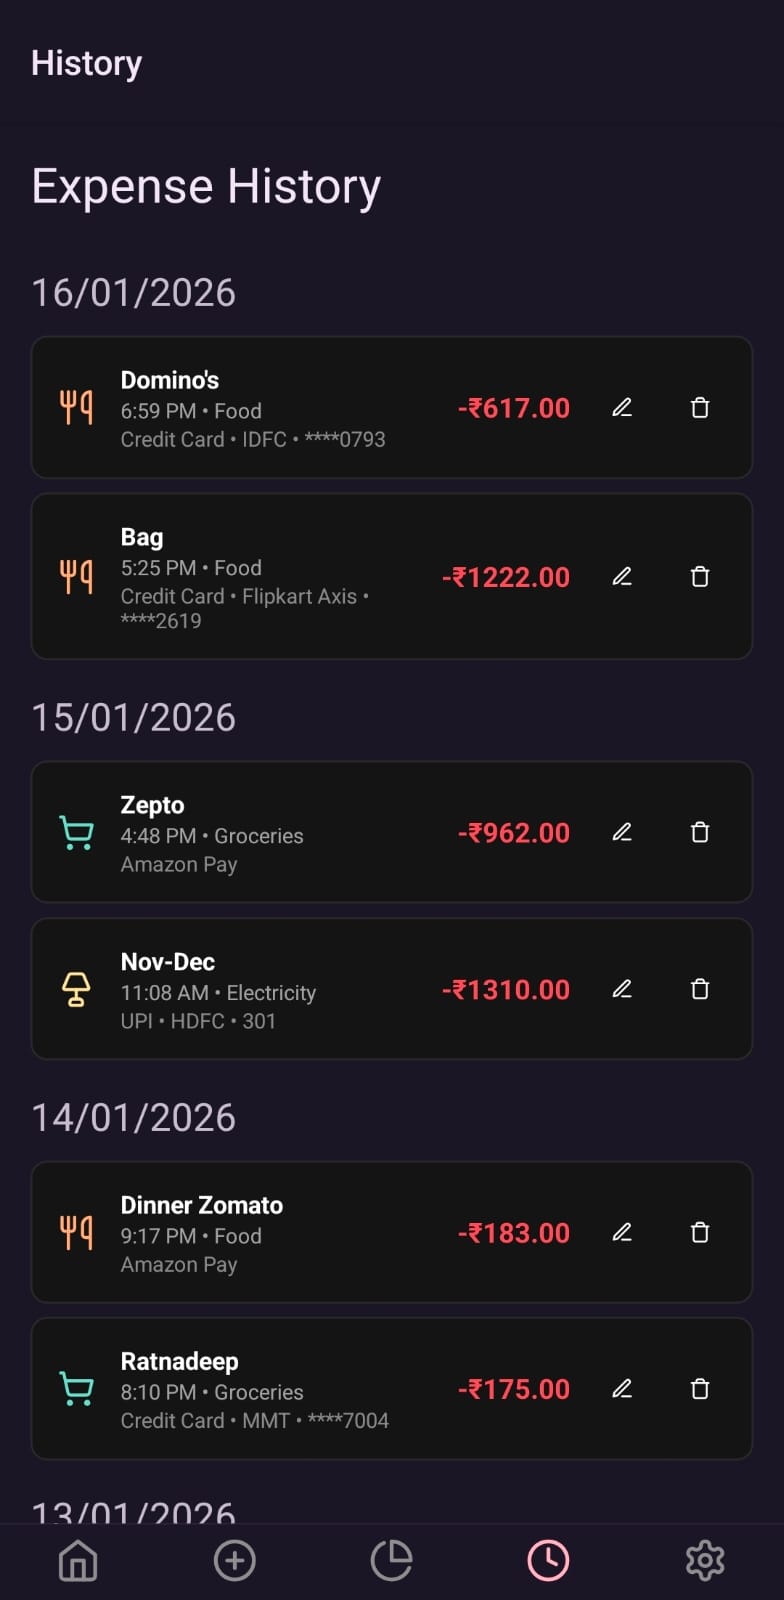
History and edits
I mess up entries all the time. The history view lets me browse past entries, open any expense, and fix it in place—no weird edit mode, no hunting.
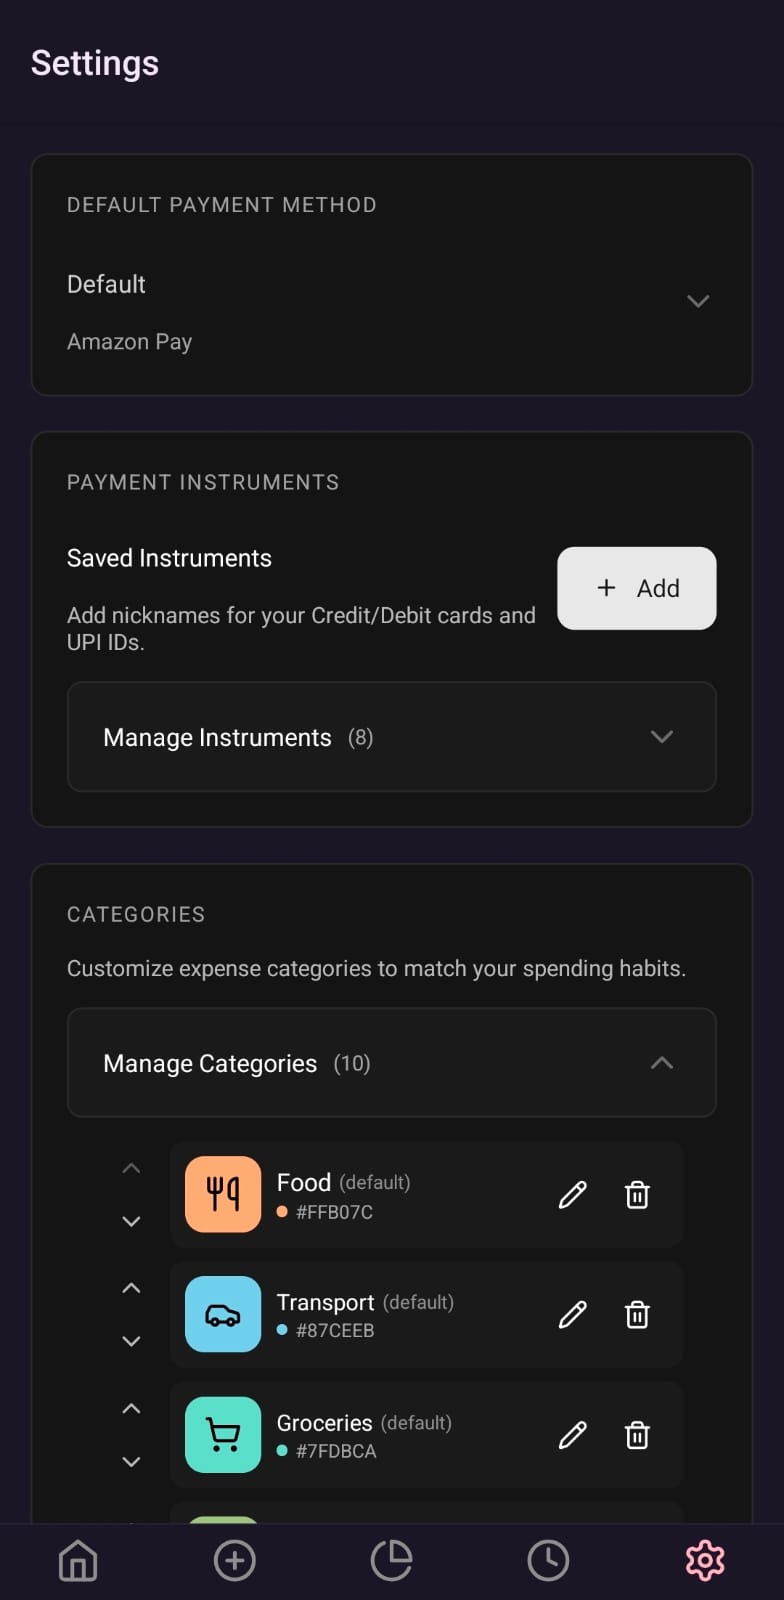
Settings that stay out of your way
Settings are intentionally boring. You can set a default payment method, add custom categories (the app ships with 8 defaults you can edit), manage saved payment instruments for deeper analytics, and enable GitHub sync to keep everything in sync across devices. Auto‑sync can run on change or on app launch.

How GitHub sync works (optional)
I designed GitHub sync to be safe, predictable, and fully optional. Your data stays local unless you explicitly turn this on.
- Daily CSV files: expenses are stored as
expenses-YYYY-MM-DD.csvin your repo - Merge‑first workflow: fetch → merge → push, to avoid accidental data loss
- Conflict handling: timestamp‑based resolution, with true conflict prompts only when needed
- Differential uploads: only changed files are uploaded, and changes are batched into a single commit
- Settings sync (optional): categories and saved instruments can be synced via
settings.json
Built for speed
I’m allergic to janky lists, so performance was a first‑class goal. Virtualized lists, memoized components, and a lightweight state layer keep things snappy even with long histories. The UI stays minimal so logging an expense takes seconds, not minutes.
Privacy notes
- No required external accounts to use the app
- GitHub sync is opt‑in and stores files in your own repository (daily CSVs)
- No selling of data
If you want to dig deeper, here are the links I keep updated:
Get involved
Expense Buddy is available on Google Play Store. Give it a try and let me know what you think!